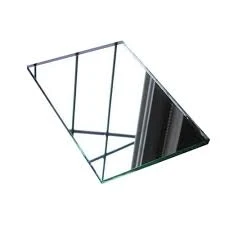

The Installation of Low-E Glass A Comprehensive Guide
In the quest for energy efficiency and enhanced comfort in residential and commercial buildings, Low-E (low emissivity) glass has emerged as a popular choice. This specialized glass coating helps control heat transfer and UV exposure, making it a valuable addition to modern construction and renovation projects. In this article, we will explore the installation process of Low-E glass, its benefits, and key considerations to ensure optimal performance.
Understanding Low-E Glass
Low-E glass is designed with a microscopically thin coating that reflects infrared energy while allowing visible light to pass through. This innovative feature helps to keep interiors cooler in the summer and warmer in the winter by reducing heat loss. In addition to improving energy efficiency, Low-E glass also protects furnishings from harmful UV rays, reducing the risk of fading.
Preparing for Installation
Before diving into the installation process, it’s essential to prepare adequately. Start by selecting the appropriate type of Low-E glass for your project. There are two primary types hard-coat and soft-coat. Hard-coat Low-E glass is more durable and better suited for applications where there might be exposure to harsh conditions, while soft-coat Low-E glass offers superior performance in terms of energy efficiency but may require more careful handling.
Once you’ve chosen the right type of glass, it is crucial to measure the window frames accurately. Proper measurements will ensure that the new glass fits seamlessly into the existing framework. It is advisable to consult a professional or follow manufacturer guidelines during this stage to avoid costly mistakes.
Installation Steps

1. Remove Old Glass Start by carefully removing the old glass from the window frame. Use safety gloves and goggles to protect yourself from sharp edges. It may help to use a putty knife to separate the glass from the frame.
2. Clean the Frame Once the old glass is removed, thoroughly clean the window frame to eliminate debris, dust, or old adhesive. This step is vital for ensuring a proper seal with the new Low-E glass.
3. Apply Glazing Tape Before installing the Low-E glass, apply a high-quality glazing tape to the frame. This tape will help create a weatherproof seal and prevent air leakage.
4. Install the Low-E Glass Carefully place the Low-E glass into the frame, ensuring it aligns correctly with any locking mechanisms or supports. Take care not to touch the Low-E coating on the glass surface, as oils from your fingers can affect its performance.
5. Secure the Glass Once the glass is in place, use glazing points or clips to secure it adequately. Apply the appropriate caulk or sealant around the edges to further enhance the seal and restore the frame's integrity.
6. Final Adjustments After installation, check for any gaps or irregularities. Make sure the window operates smoothly and that there are no leaks by performing a water test if necessary.
Conclusion
The installation of Low-E glass is a straightforward process that can significantly enhance the energy efficiency of a building. By understanding the necessary steps and precautions, homeowners and builders can ensure that they enjoy the myriad benefits of Low-E glass. Not only does it contribute to lower energy bills, but it also improves indoor comfort and protects furnishings from UV damage. Embracing this innovative solution is a step toward a more sustainable future in construction and design.